31 December 2008

Final


It's my last post of this year!
See you all in 2009!

26 November 2008

Adult Rating


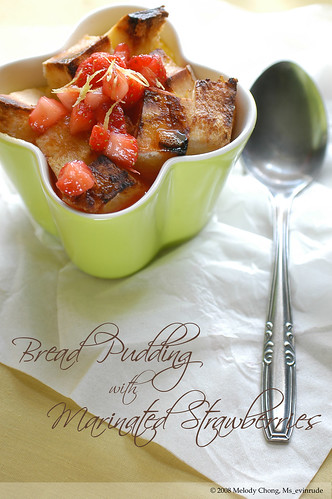
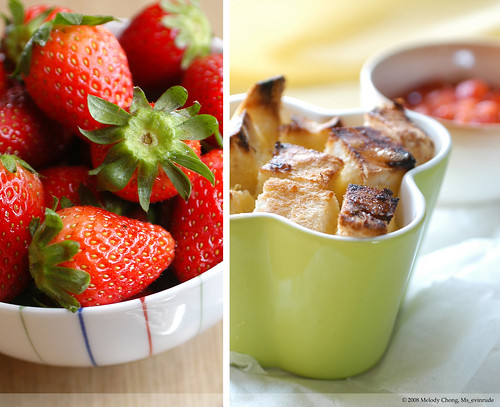
A much awaited return! At least to the few who drop by now and then. Honestly, if not for those nudges for me to start blogging again, I would have been too lazy to. Bad me. So far, I've also yet to pick up my camera and cooking utensils, but hopefully I will do so a couple of times before I set off on my holiday to Japan.

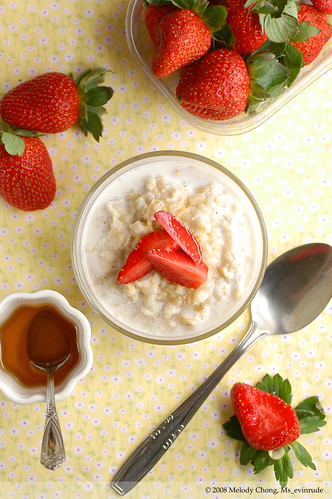
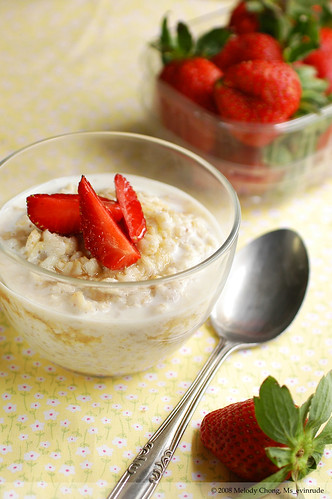
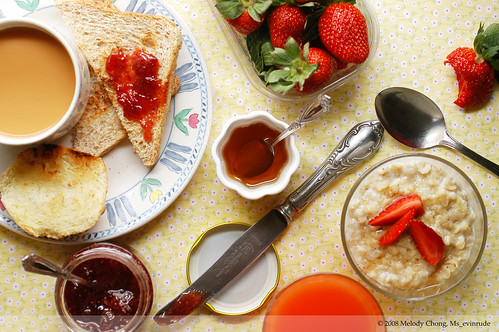
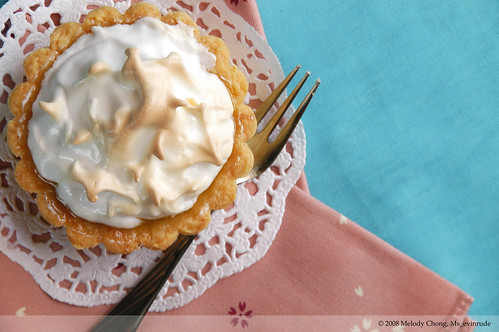
I left before truly finishing my strawberry phase so I really have just this one recipe left. As a warm up to my return to the blogosphere, it's really quite short and easy. Despite that, I do think it results in a very pretty and classy outcome, good for entertaining!

Because the whole recipe barely uses any sugar, it's quite adult and probably won't go very well with the sweet tooth. And because it's so simple, it's important to use sweet strawberries and good chocolate if you have access to them, or at least those you think are good. The tart pastry recipe yields much more than required for 2 individual tarts, but you can freeze the extra till you decide to make more tarts again.


Bitter Chocolate and Strawberry Tart
Makes 2 4" tarts

Chocolate Tart Pastry
240g flour
25g sugar
2tbsp unsweetened cocoa powder
Pinch of salt
125g butter, chopped and chilled
1 egg yolk
40ml ice cold water

- Sift flour, sugar, cocoa powder and salt into a large bowl. Stir to combine.
- Using the fingertips, rub in the butter until the mixture resembles coarse oatmeal. While incorporating the butter, lift up your hand slightly and let the flour fall back into the bowl.
- When no big pieces of butter is left, mix the egg yolk and water in a small bowl and pour it over the flour mixture.
- Knead gently with fingertips until the dough comes together in a ball. Work lightly and as little as possible so that the pastry will be flaky when baked.
- Divide the dough into 3 portions, wrap each portion in cling wrap and chill for 30 mins or until ready to use. I like to wrap each portion into individual plastic bags and then pop all into a Ziploc bag if I'm freezing them.

- Preheat oven to 180 degC. Lightly butter and flour 2 4" tart moulds.
- Take out 1 portion (out of 3) of the chilled dough, roll out to 1/8" - 1/4" thick and fit into tart moulds.
- Trim off the excess from the edges and prick the base with a fork. Chill again for another 30 mins.
- Bake the tart pastry for 20 - 30mins until cooked through.
- Let chill before assembling the tarts.


Ganache
100g dark chocolate
80ml cream
2 tbsp milk (optional)

Topping
10 - 12 smallish strawberries

- Put the chocolate, into a large bowl. I use chocolate pallets, but if yours comes in a block, chop into smaller pieces to facilitate melting.
- In a small pot over medium heat, cook cream and milk until small bubbles form around the sides and then remove from heat.
- Add the cream to the chocolate and stir occasionally until all the chocolate has melted. Let cool before assembling the tarts.
- Divide the cooled ganache into the baked tart crusts. Let chill in the refrigerator until ready to serve before proceeding to the next step. If you cut the strawberries too early, they'll dry out when you chill the tart.
- 15mins before serving, wash and hull the strawberries. I cut the tops off so that it's easier to slice them.
- Place strawberries, cut side (top) down, and cut into thin slices.
- Finish the tart by arranging the strawberries on top in a flower-like pattern. Work from the outermost towards the center.

10 November 2008

Lost and Found


Doudou's been found! He was sent to the AVA on Tuesday and we just got him back today. His flying licence has since been suspended until further notice. Thank you all for your well wishes and help.

this goes out to all those who happen to live around the old airport road area (guillemard road, mountbatten, pine close, cassia cresent).

my pet parrot (african grey), doudou, is missing. the last we saw of him was when he flew out our bedroom window in pine close towards cassia cresent at 7pm on 10 nov (mon). he needs to be fed special bird feed twice a day by syringe. we're very worried for his safety and well-being.

if you find him, or any parrot that looks like him roaming in the area, pls contact me at melon_tea[at]hotmail[dot]com.

i'd greatly appreciate your help. thanks

22 August 2008

Hiatus


I'm taking a break from blogging and flickr-ing to concentrate on school work and sleep.
See you soon!

09 August 2008

Strawberry Cream Scones


I love scones. Don't you? But I never thought scones could taste so good! I've always been eating scones bought from bakeries like Sweet Secrets and Four Leaf because they're not expensive to get, and taste, well, really quite good. But that was all before I decided to have some scones bake in my oven. I'm not boasting about my baking or whatsoever. Most definitely not. Rather I'm just so glad I found such a good recipe!

I was searching for scone recipes online, when I saw this recipe on Lara's blog. Reading through the post, Lara had nothing but praise for the recipe (like "nearly fell on the floor after I tasted them" and "simply amazing"). Running through the ingredients list, I was a little reluctant as it asked for really quite "an epic amount of cream". But I still decided to give it a go. And I'm so glad I did! It was just as what Lara had said, very moist and light and just oh-so good. Stand aside, you dry and dense store-bought scones! Whipping the cream created such a fluffy texture for a scone that I never knew could or should be in a scone.


The only problem I had was shaping these babies. Because the dough was so wet, I kinda gave up trying to shape and cut them and just dropped tablespoons of them onto the baking sheet for fear of destroying all the effort of incorporating whipped cream for a fluffy scone. The thing is, also because they're so wet, they spread a little too much and ended up quite thin and looked more like a cookie than a scone. Still, they tasted great warm from the oven! If it ever lasts till the next day, I always like to toast them for a while to warm them up and the outsides will get a little crisp while the inside is still fluffy and moist. A very flexible recipe, I substituted blueberries that Lara used to diced strawberries and made only 1/3 of the full recipe. While these scones are great on their own, I drizzled them with melted chocolate to dress them up a little and made them all the more delicious. I finished the baking and shooting late in the afternoon and by the next day, they were gone. Even though there was only 6 scones, considering the rate food disappears from my kitchen, it really is quite an amazing feat.


Strawberry Cream Scones

(Makes 6)

1 cup strawberries, hulled and diced
140g flour
50g sugar
2/3 tbsp baking powder
Pinch of salt
200ml whipping cream

Melted chocolate (optional)

- Preheat oven to 180 degC.
- Sift flour, sugar, baking powder and salt into a bowl. Mix in the strawberries.
- Whip, with a standing mixer or a whisk, the cream until medium soft peaks form.
- Gently fold in the whipped cream into the flour and fruit mixture, taking care not squash the strawberries.
- To shape, turn the dough onto a floured working surface. With floured hands, shape the dough into 1" thick rectangle and fold it in half. If it is still too wet, dust with a little more flour and shape and fold again. Cut into triangles or squares and place on a lined baking sheet 1cm apart. This is so that they will hold their shape even if they spread.
- If like me, you're afraid of dealing with the mess and don't mind awkwardly-shaped scones, drop tablespoonfuls of the scone mixture onto a lined baking sheet.
- Bake the scones in preheated oven for 20 - 25mins or until browned on top.
- Let cool for 15 mins and drizzle with melted chocolate if desired.

31 July 2008

Salad in a Cup


Seeing that more than a few days have passed since I posted my previous recipe and my pictures for this post on Flickr, I thought I had better get on with it. You know, in case I get all lazy and decide to procrastinate (again) and end up not posting it at all. I've decided to take a little break from strawberries but I do still have some strawberry recipes scheduled to be posted but that'll come later. School's been busy, even though it's only 2nd week of the term and semester. I've been wanting to pack lunch, but almost always too tired at night to prepare for the next day or that I have too many things to bring to class and don't want to add to the "luggage". Forgive me, I do rant a lot.

Now, about the recipe! I think I have already established the fact that I'm a salad girl. And I don't have to remind you how easy it is to throw together a salad! Since starting my low-carb diet years ago, I've been actively trying to cut down on my carb intake. So rice had to go, most potatoes too. But I really love noodles. Soba, glass noodles, udon, vermicelli, ban mian, etc. So sometimes for variation, I add noodles into my salad. This salad of udon and crab was very much inspired by Pepper Lunch! Udon makes a good addition to a salad because it's just a plain noodle, hence makes a good base and mingles with flavours well. Serving the salad in a cup/glass was very much triggered by the fact that Pepper Lunch served theirs in a plastic cup. Isn't it genius?! All you have to do is put the ingredients in the cup, drizzle the dressing and then give the cup a good shake (covered of course!) and there you go! No messy tossing with forks or spoons. And it's some exercise before you meal! All good things.


Black and White Sesame Seeds

For this recipe, I used Surimi crab, which basically is imitation crab meat. But instead of the crabsticks, I used those found at the sushi counters in Cold Storage. I find (ok, think) that it tastes more like crab meat. If you're feeling luxurious and hardworking, buy crabs, cook them and remove flesh from the shells! The dressing is again, something that I just threw together with the ingredients I had on hand and feel free to adjust the proportions to your likings.


Salad of Udon and Crab
(Serves 2)

Dressing
4 tbsp soba shoyu (or Japanese soy sauce)
1 tsp sesame seeds, toasted and crushed
1 tsp chili flakes
1 tsp honey
1/2 tsp sesame oil

100g fresh udon
1 egg, beaten
1 cucumber
1 medium-sized carrot
100g Surimi crab (or fresh crab meat)

- Combine all the ingredients for the dressing together in a bowl and mix well. Leave to sit while preparing the other ingredients.
- In a pot of boiling water, cook the udon for about 1 - 2mins. Drain and let cool.
- Heat 2 tsp of oil in a frying pan and fry the egg to make an omelette. Remove from frying pan and let cool before cutting into 1cm strips. I find it easier to cut the omelette into half, then roll each half to cut.
- Wash, peel (if desired) and cut off the tops and ends of the cucumber and carrot. Grate the vegetables to get thin strips. I like to use the largest grater for salads like this. Alternatively, you can julienne the vegetables with a knife. If you find the carrots too raw for your taste, you can blanch them in hot water for about 30secs.
- To assemble, layer the ingredients for the salad into 2 glasses for individual servings. First being the udon, then carrots, then cucumbers, crab meat and then the omelette. Garnish with spring onions or coriander if you wish to. Let chill for about 10mins in the refrigerator.
- When ready to eat, drizzle the dressing over the salad, cover the glass with a plate or saucer and shake! If presentation and playing with food isn't your thing, just toss everything in a bowl and enjoy, but it won't be so fun of course.


22 July 2008

Sweetly Pink


Haven't I been a good blogger these couple of weeks? Tee hee... I've got posts up within 1 week of each other for 2 weeks now! Alright, I'm starting to wonder if you guys are getting sick of strawberries. But I still have a few more posts on strawberries that I have yet to publish. I don't know, but I really think I went a little crazy for strawberries. But, I digress.

So, the Indonesian strawberries weren't very tasty. Though that is quite a sad truth about strawberries that weren't exactly cheap, I think it gave me the opportunity to try salvaging it. I had been wanting to try a recipe from Anita at Dessert First but always used the strawberries up for something else more suitable for it. So with the quite tasteless strawberries, I set on to roasting them and use as a topping to some citrus-flavoured meringues. Pairing light, crisp meringues with roasted, syrupy strawberries seemed quite genius to me. It's a very easy recipe, but I think the result looks so classy!


I wanted to make a refreshing dessert with this but encountered slight problems. Firstly, although I really love the texture of meringues (you know how the crispy outer shell breaks and dissolves away to reveal the very soft and light innards), I really find them a little too sweet. But to yield a nicely whipped and dense meringue, you'll need at about 50g of sugar per egg white (most say 60g but I've tried 40-50g with good results too). And then there was the problem of flavouring the meringues. I wanted to flavour it with citrus juice and zest to counter the sweetness but it didn't quite show through. Or perhaps I just wasn't brave enough to add enough juice to the egg white. Still, I think it's a recipe worth a try if you're aiming for something more fancy yet still easy to make.


Getting ready to make meringues


Citrus Meringues with Roasted Strawberries
(Makes 6)

3 large strawberries or 6 small ones
2 tbsp sugar
1/2 tbsp lemon and orange zest

1 large egg white
50g sugar
1/2 tbsp lemon juice
1 tbsp orange juice
1 tbsp lemon and orange zest

- Preheat oven to 200 degC.
- Wash and hull strawberries. If they are big, cut them in half.
- Place the strawberries on a baking sheet and sprinkle with the sugar and citrus zest. Roast in the oven for about 10 minutes or until soft and syrupy.
- Lower the oven temperature to 120 degC.
- To make meringues, beat the egg white with an electric mixer until soft peaks.
- Add sugar gradually while beating until stiff peaks form. When the egg whites are about ready, add the citrus juice and zest.
- Spoon tablespoonfuls of the meringue onto a lined baking sheet to make 6 meringues. Make a little dent in the center of each meringue to hold the strawberries.
- Bake the meringues in preheated oven for about 30mins or until crisp on the outside. Let the meringues dry in the oven for another 30mins.
- To serve, top each meringue with roasted strawberries. The meringues alone keep well in an air tight container for up to 1 week.

16 July 2008

Comfort Food


Don't you hate falling sick? I do. But I'm also glad to say that I'm not all that susceptible to colds and flu and fall sick only, thank god, a couple of times a year. But, rather unfortunately too, I fall sick during a break after a long period of stress and hard work. It's like the immune system relaxes just as I start relaxing too.

Last week, having completed my internship, I finally got a chance to wake up late on a weekday and had planned to start a cooking and baking spree and do some blogging. But I just had to come down with an infection. A gum infection. I don't know how it happened, but I woke up on Sunday and it started feeling sore. By the time I checked to see what really was the problem in the evening, there was this large ulceration at the back of my jaw and the pain had spread to my throat. For anyone who had the rather unfortunate experience of a bad wisdom-toothache, you'll know how it's like to not be able to open your mouth big enough to put food in with a spoon.

So by the time Monday came, I was yearning to cook and photograph but not really wanting to eat. Now there's this one thing that I always cook for myself when I fall sick: barley. Yup, pearl barley. I just cook some in lots of water till tender, add some sugar and have that for the whole day. It's almost like a craving for times when I'm unwell. Still, I wanted to tie it in with the strawberry phase that I'm currently in and plain cooked barley didn't seem to accommodate the red berry quite well. A little thinking and a barley and oatmeal porridge was cooking on the stove. The barley added a nice bite to the porridge which I liked (a little ironic since I was down with a gum infection) and topped with strawberries and honey, makes a wholesome breakfast for a gloomy Monday morning. Besides the chewiness of barley, I also like my oatmeal porridge, any porridge for that matter, a little thicker. A little like a pudding I think.

The strawberries I used this time were from Indonesia and I was really quite happy to find them at a Shop & Save outlet. They were really beautiful, I have to say. No bruises at all, lovely leaves and even some remaining petals on the berries! Gorgeously red and in small punnets, which I think is good if you can't finish the very perishable fruits fast enough. At S$2.95 for 1/2 a pound-punnet, it's almost the same price as the US strawberries when they're not on sale. So I put them into my shopping basket to bring home to try. They lasted long for strawberries, I bought them on Thursday night and they remained perfect for 1 whole week. However, I'm sad to report that they were really quite tasteless, if not really tart. Oh well...

Barley and Oatmeal Porridge
(Serves 2 small stomachs)

50g pearl barley
50g rolled oats
2 tbsp cereal mix (not breakfast cereal! i used this but it's optional)
300ml milk

Strawberries, hulled and quartered
Honey

- Rinse the barley and cook in a 2 cups of water for 30mins or until tender and the water is almost evaporated. If the water has evaporated before the barley is cooked, add another 1/2 - 1 cup of water.
- When the barley is tender, add in rolled oats, cereal and the milk. Stir and continue cooking until the oats are cooked through, adding more milk if desired.
- Serve warm, topped with strawberries and drizzled with honey.


11 July 2008

Keep Jammin'

No excuses this time. The latest hiatus is just due to my laziness to blog after a day's of work at my internship company. So, after a full month of non-blogging action, I'm continuing with my strawberry phase with homemade strawberry jam!


Previously, I've done a brief introduction on Korean strawberries. This time I used their American counterparts. I would have bought the Korean strawberries if they were still available when I was at Carrefour, but the US strawberries were the only ones left. As previously stated, I found the US strawberries much bigger (mostly) than the Korean ones but usually were more bruised, probably from the rough packing and travelling. They were about to die quite a horrible death on the shelves and I had quite a hard time choosing the best 2 punnets for my jam making. But it wasn't all bad since they were even cheaper than stated and I paid only S$8.90 for 2 pounds of awfully ripe strawberries. Being very ripe (you know, almost turning black), they were very very fragrant and really sweet. My family ate almost 1 pound while I hulled and cut the strawberries to make jam. In the end I only had a little over 500g of strawberries left to make jam but it was all good since I didn't have too many jam jars on hand either.

Jam making, apparently, seems to be quite a daunting task for many, but it's really quite easy! All you do is boil the cut fruit and sugar in a pot to the desired consistency and you'll have nice bottles of jam for toast every morning. The tiring part probably is to keep an eye on the jam and stir it almost constantly so that it doesn't burn. I like my jams thicker for easy spreading on toast and whatnots so I've stated a longer cooking time. Some recipes include the addition of pectin for better jelling but I didn't think it was necessary after perusing recipes that I've found online. There's also a cold saucer test that might be quite useful though I didn't rely on that. The recipe I followed mainly was Mae's recipe but hers was more syrupy and I also think the ripeness of the strawberries affect the jelling effect. So just adjust cooking time to your liking.


Strawberry Jam
(Makes 2 - 3 275ml jars)

500g strawberries
300g sugar
1 tbsp lemon zest
1 tbsp lemon juice

- Wash, hull and quarter the strawberries. You can als
o half them (for a more chunky jam like Mae's) or blitz a portion in the food processor. Set aside.
- In a heavy bottom saucepan, combine sugar, lemon juice and zest and stir over medium heat until the sugar has dissolved.
- Add the strawberries and stir gently until it comes to a boil.
- Cook, stirring constantly, for 40 - 60mins depending on the consistency you like. I cooked mine for 60mins. For a thicker jam, you can do a test with a cold saucer (popped into the freezer before you start cooking), drop a bit of jam onto the saucer and leave for a few seconds. If the jam still runs like a liquid, cook for another 10mins and test again. It's advisable to start testing at about 40mins and gradually increase the cooking time. You can also taste the jam and add more sugar if desired.
- Fill the jam into sterilised jam jars leaving about 1cm from the brim(careful it's hot!) and screw on the cap tightly. Let cool. For more presentable jam to be used as gifts, spoon off the foam on the jam before filling into the jars. I didn't bother because I thought it was quite a waste of beautiful jam.


11 June 2008

Strawberry Story: A Prologue


I had wanted to go out to get some strawberries over the weekend and do some baking and post recipes like I promised, but the dark clouds were looming and I gave up my baking plans. Because you know I won't want to take photographs when it's cloudy, which actually is part of the ultimate goal besides having something to eat. So I'm going to leave you with a very simple way to prepare strawberries and an update of my bread pudding recipe.


It's summer in the Northern hemisphere and though Singapore sits on the equator, I still get to eat according to the seasons with the foreign imports. I'm not sure if bread pudding is summer food but I think the marinated strawberries add a fruity touch to it which is just my kind of summer. The addition of lemon zest to both the custard and the strawberries also make it more refreshing besides perfuming the dessert.

The bread pudding recipe that follows serves only 1 but it's a larger (approximately 1 3/4 times... okay... 2!) serving than what I did previously in cupcake cups. As an update to the bread pudding recipe, I think I would advise to leave the bread (I used a rustic white loaf from Carrefour which was the best white bread I've had!) to soak in the custard mixture for at least 30 minutes. I find that the 10 - 15 minutes that I stated in my previous recipe didn't adequately allow the bread to absorb the custard and the bread was still slightly on the dry side. Also an additional step to coat the ramekins with some melted butter and sugar leaves a syrup at the bottom of the bowl when baked which I think The marinated strawberries were done by eye so there's no measurements. Very simple flavours but distinctively summery with the fragrance of strawberries. Of course it's so versatile you could have it with anything! I had it spooned over some yoghurt together with my passionfruit curd and I imagine it to be just as wonderful over some crepes or even ice cream! Now that's what I call summer!


Marinated Strawberries

Strawberries, hulled and diced
Sugar
Lemon juice and zest
Honey

- Throw everything into a bowl and mix briefly. Let sit for flavours to mingle or until ready to serve. You can also use only sugar or solely honey.


Bread Pudding for 1


1 tsp melted butter
1 tsp sugar
2 3/4"-thick slices of bread
200ml milk
1 egg
Zest and juice of 1/2 a lemon
1 tbsp sugar
1 tbsp honey
Extra melted butter (optional)

- Brush ramekins with melted butter and coat with the sugar. Skip this step if using cupcake cups.
- Cut the bread into 1" thick sticks and arrange in ramekin. Cut the bread sticks shorter if they stick out of the ramekin too much, 1/2" is okay.
- Whisk milk, egg, lemon juice and zest, sugar and honey together until the sugar has dissolved.
- Pour over the bread in the ramekin. If it looks like it's going to overflow, stop and let the bread absorb the mixture for a while before adding the rest. Let sit for 30 - 40mins. Alternatively, you can just prepare it and let it sit in the fridge, forget about it for a while and come back after you've finish the things you have on hand.
- Preheat oven to 180 degC. Dot the tops of the bread with extra melted butter if desired.
- Bake the bread pudding in preheated oven for 45mins or until the custard is set and the bread is browned.
- Cool for 5 - 10 minutes and serve slightly warm with marinated strawberries and the syrup.

06 June 2008

Strawberry Love


It's apparently strawberry season now and the punnets of these beautiful red jewels look so tempting on the shelves! These strawberries are from Korea and packed very neatly in the plastic cases so less of them were bruised, unlike the ones imported from the US. Although I'm not exceptionally crazy about strawberries, it's really hard to refrain from buying them when hoards of them are around. And it's quite fun trying to eat according to the seasons by tapping into the seasonal foods from temperate regions. I'm hoping to get more strawberries before they run out and use them in some wonderful recipes I've seen around.

Recipes to come soon!

31 May 2008

Mini Pies = Pielets


Mini tarts are called tartlets, so mini pies must be called pielets right? And passionfruit meringue pielets these shall be.

So, I promised a fancier way to serve the passionfruit curd (I know it took a little too long!) and while you actually can just have it on your toast (which is still very good, btw), I think sometimes it doesn't hurt to make a little more effort to impress people a little. By fancy, I really didn't mean difficult. Just needing a little more time.

These meringue pielets are fairly easy to put together. The tart base is very easy and quick to do, but so good! Fragrant with a nice buttery, flaky crumb, I think it will work well with many sweet tarts. I used Fanny's recipe for the tart base and followed it word for word. I didn't the need to change it. I've since used it twice and my favourite part about it, no shrinkage when baking! All-in-all, it takes about another 1 or 2 hours to assemble the pielets including the time needed to chill and the tart dough. The full recipe for tart base makes about 11 3" tartlets (weird number, I know). The following recipe makes 4 pielets so it will use 1/3 of the tart dough recipe. Or you can simply bake up all the tart bases and store in an airtight box for future use!


Passionfruit Meringue Pielets

Tart Dough
250g plain flour
25g sugar
Pinch of salt
125g butter, chilled and diced
1 egg yolk
40ml ice cold water

Filling and Meringue
4 heaping tbsp passionfruit curd (find recipe here)
1 egg white (I used the one left from making the pastry)
40g sugar

- Sift flour, sugar and salt into a large mixing bowl.
- Using only your fingertips, rub the butter into the flour until the mixture resembles coarse oatmeal. When incorporating the butter into the flour, lift up your hand slightly and let the flour fall back into the bowl.
- Mix the egg yolk and cold water together in a small bowl and pour over the flour mixture.
- Knead gently until the dough comes together into a ball. Work the dough as little as possible so that it will remain light and flaky when baked.
- Wrap in cling wrap or a plastic bag and chill for 30mins or until ready to use. You may want to divide the dough into 3 parts before wrapping so that you can take out only what you need when baking.
- Preheat oven to 180 degC. Lightly butter and flour 4 3" tart moulds.
- Roll out 1/3 of the tart dough to about 1/8" - 1/4" thick between the clingwrap or plastic bag or on a lightly floured surface. You may find that you need a bit more tart dough depending on how thick you roll out the dough.
- Drape the tart dough over the moulds and press into the edges. I find it easier to try to fit it into the bottom first before letting the dough drape over the sides.
- Trim the excess dough from the rim and prick the base with a fork. Chill again for 20mins.
- Bake the tart bases blind for 25mins until golden brown. When baked, let cool before filling with passionfruit curd. Increase oven temperature to 200 degC.
- While the tart shells are cooling, whip the egg white until soft peaks form and slowly add in the sugar while whipping until stiff.
- Fill the cooled tart bases with 1 heaping tbsp of passionfruit curd each and top with the meringue, spreading it out to cover the passionfruit curd and piling up high in the center. Create whiplash peaks using a knife. Alternatively, you might want to pipe the meringue and making decorative swirls or using patterned nozzles.
- Bake 8-10mins or until the meringue browns slightly. You can use a blow torch too.


I know most people don't keep meringue pies, but if you happen to have leftovers, or they cool before you have a chance to eat them, pop them into the oven or toaster to warm up again before serving. I find that they taste better warm because the crust is more crisp, rather than hard.

21 May 2008

Passion for Passionfruit Curd


I first bought passionfruit curd on my Perth trip in 2005 with my art classmates without knowing what exactly it was. It just sounded... exotic. I knew what passionfruits were, how they looked like, how the plant/flowers/vine looked like. But I never got to eating real passionfruits. The only "passionfruits" I tasted before were passionfruit *flavoured* drinks and didn't know if they were anything like the real deal. So imagine my glee when I saw them fresh in the Singaporean supermarkets last year! Okay, back to passionfruit curd. I was pleasantly surprised! I thought it would be kinda jam-like, but it was smoother since it was more "liquid", more rich with the addition of eggs and butter and less cloying because it wasn't as sweet.

Ever since I found passionfruits on sale in the supermarkets, I wanted to make passionfruit curd. But you know, procrastination, school, yada yada... Many times I bought passionfruits to "make passionfruit curd when the weekend comes" but they either end up eaten as it is or worse, dying in the refrigerator (which, sadly, happens all too often with ingredients I buy). Well, it took me long enough to recreate passionfruit curd in my kitchen and I'm glad to say it's so easy I won't have to buy it again! Taste wise, the flavour of the passionfruits weren't showing through much. It might be because the passionfruits (the Indonesian/Malaysian variety, green on the outside, reminds me of Pong Pong) were a little lossy on the flavour to begin with, or the fact that the lemons I used were too fragrant. Despite that, it's still a great recipe! I love the smooth texture of the curd, the tang and fragrance of the lemon and the crunch of the passionfruit seeds. Seriously, I "wiped" the bowl in which I prepared the curd in with a slice of white bread. I wasn't about to let any bit of this yellowy goodness go to waste. I also had it with yoghurt and cake, both of which proved to be delicious. If you're in the mood for something fancier, I'll follow up within the next few days with another recipe.


Passionfruit Curd
(Makes approximately 500ml)

2 lemons
6 passionfruits
80g sugar
60g butter
2 large eggs, lightly beaten

- Zest and juice the lemons and set aside.
- Remove the pulp from the passionfruits and set aside.
- Bring a pot of water to boil. When the water is boiling, turn the heat down and let the water come to a slow simmer. Set a heatproof bowl over the pot of water, making sure the bottom of the bowl doesn't touch the water.
- Combine lemon zest and juice, sugar and butter in the heatproof bowl and stir occasionally until the sugar dissolves.
- When the sugar has dissolved, add in the passionfruit pulp and stir briefly. Do not overheat.
- Add in the eggs slowly through a strainer and whisk constantly. The mixture will take some time to thicken, about 10mins. When it thickens and starts to coat the whisk/spoon, remove from the heat, let cool and store in sterlised jars.


P.S. You might want to try another method which involves stirring (constantly!) all the ingredients, except the butter, in a bowl over a pot of simmering water until it thickens. When the mixture has thickened, remove from heat and whisk in the cold butter to incorporate.

11 May 2008

I'm Back!

And in one complete piece! Phew~!

Did you miss me?

After a long month of struggling with pencils, brushes, needles and sewing machines, I'm glad to report that I've fully accomplished my mission and successfully, more or less, survived my second academic year at fashion school! YAY! If you want, you can take a look at my proudest creation up to date.

Ok! So back to the edible.


I actually baked a couple of times before my hellish term started back in March but didn't get around to posting about them. I've been pestered by SK for quite some time to make bread pudding. But I've never had bread pudding before, and thought it was just simply soggy french toast. So it didn't appeal THAT much to me and I obviously procrastinated. Then it seemed to be like bread pudding season somewhere in Fall of the Northern hemisphere, when I saw this and this. But I still didn't make it.


So after a long long wait, I finally got around to making bread pudding in March. But that's partly because I had leftover cranberries and apples and oranges to use and found it exactly the ingredients of this bread pudding which I thought looked really quite good.

Not having bread pudding before, much less making it, I looked through some trusty food blogs online for recipes to reference to. And my favourite (and only) dessert cookbook. And they seemed easy enough: thickly sliced bread in a simple custard of milk (sometimes cream), eggs and sugar make up a very basic recipe which can be flavoured and tweaked with additions of other ingredients. So, to use up the leftover ingredients that I've had in my refrigerator for *ahem* months *ahem*, I infused the custard with orange zest and orange juice and topped the puddings with diced apples and cranberries. I made individual bread puddings because I brought them for a sleepover with my fellow art-sians and was quite attracted by how Bea packaged hers. I'm not sure if I over-filled my cupcake cups because they were leaking by the time they were supposed to go into the oven and I had to stack up to 4 cups for 1 pudding. So feel free to use ceramic ramekins or baking dishes if you're not going to have them lugged around like me.

Truth be told, I can't remember the exact quantities of the ingredients I used, so I'm going to leave you with some very very vague measurements here. But I promise to recreate something soon enough to post an accurate recipe that works.


Cranberry and Apple Bread Pudding

Ingredients
1 green apple (I used Granny Smith)
~200g loaf of multi-grain bread
400ml milk
2 large eggs
~80g sugar + 1 tbsp
Zest and juice of 1 orange
Handful of cranberries
Icing sugar for dusting

- Peel, core and dice the green apple. Set in a bowl and let macerate with orange juice and 1 tbsp of sugar.
- Slice bread thickly into 3/4" slices. Cut them into 1" sticks.
- Divide bread sticks evenly into 10 individual cupcake cups, lined with wax paper, or greased ramekins/baking dishes.
- In a large bowl, whisk together milk, eggs, sugar and orange zest.
- Divide the custard mixture evenly into the cups and let the bread soak up for about 10 - 15mins. Here's where you need to keep an eye on the puddings if you're using cupcake cups. If they leak, layer on the paper cups.
- Preheat oven to 180 degC.
- Top the individual puddings with macerated apples and cranberries and bake for 45mins.
- Let cool slightly before serving and dust with icing sugar if desired.

By the time we got around to eating the puddings in the midst of our movie marathon, they were already quite cold and I don't think it did them much justice. The tops were kinda dried out which I thought would be slightly crusty and crispy if it had been warm, or not been left out for that long. I think If I were to do it again, I'd probably not have my bread stick out of the cups this much, or soak them all in custard before filling them into the cups. Also, my friends thought they weren't sweet enough and I drizzled on extra syrup for them. I don't have a major sweet tooth and didn't have a problem with the sugar content. If you like your desserts really sweet, add more more more! sugar.

31 March 2008

Arrival of Spring

It's the end of March and I haven't got around to posting any of my foodie-ventures yet. I managed to squeeze time in to bake some, bread pudding, some brownies, apple tarts, but I've been too busy and lazy (though I don't know how the two can coexist).


There's obviously a lot of things that I want to do and similarly, a lot of things that I do not. But it seems I don't have a choice but to conform. Except for a couple of exceptions like skipping school (today) to finish up some work and gather myself before I start my never-ending rat race to the finish line. For this period of time, my stocked-up secret pantry comes into great use for the easy, ready-to-eat snacks of biscuits and finger food like the sesame longers (above) and when I feel extravagant, a couple of quick-fix sandwiches.


The sesame longers I bought at Daiso, the Japanese $2 lifestyle chain, and the petit croissants from Le Petit Provence at Central, the new mall at Clarke Quay. Le Petit Provence is the sister chain of the Provence at Holland Village. I would like to say more, but somehow my mind is a little jammed up at the moment. But that leaves another post to look forward to! Though that might take a little longer than expected.

23 February 2008

Birthday Baker

Oh yeah, that's me! And I'm quite happy about that.
After baking my own birthday cake, there were of course more birthday cakes to be baked throughout the year!


Here's one for MH which I baked last Saturday for her 21st birthday. Let's hope I can keep up with the important birthdays and make everyone happy!

21 February 2008

Deja Vu

I think many food bloggers have a common problem. We avoid making the same thing too often. Because if we did, we would run out of things to blog about! But we all have recipes we turn to again and again, don't we?


So I baked white chocolate and cranberry jam cakes again. But it wasn't for myself! My classmate, Daisy, placed an order for these and a dark chocolate version (dark chocolate, peanut butter filling, nutella topping) to bring back to Indonesia for her family for Chinese New Year. Now I'm really glad because she placed the same order last year. Which means they were well received by her folks the last time!

And that makes me a happy girl.


I think I did a better job this time round with the cakes because they were more fluffy and had a moister crumb than those last year. And the white chocolate ganache isn't grainy like the previous time. I just have to work on spreading the topping on the cakes because I don't seem to be able to do it without getting the crumbs all over and destroying the smooth toppings, especially with the nutella. I think it has to do with the consistency.

More practices needed!


14 February 2008

Valentine


, originally uploaded by Ms_evinrude.

10 February 2008

New Year Detox


First of all, let me wish you all a Happy Lunar New Year! I know I should have done that a few days ago, but hey, there's 15 days to it! (i suddenly realise how similar this is to my Christmas greeting) And of course they say it's better late than never. (Did I say this too for Christmas?) For you who doesn't know what the Lunar New Year is about, wiki is your friend!


With all the celebrations going on, all the food and booze, it's really about time we all got a detox. And what better way than salads?! You know how much I love salads. They're oh-so-easy to prepare and even more so when you buy wash-and-toss salad mixes from the supermarket. It's the first time I got the a salad veg mix from the supermarket and it's a change from the usual ice-berg lettuce that I always use for my salads (because it's like the cheapest salad veg around!). And it's so convenient.

I don't really have a recipe for this 5-minute salad but if you really want something, I could tell you how I mixed my vinaigrette. As usual, I think you should just add whatever you like to your salad. I love nuts in my salad because it adds texture and I'm not keen on eating like a cow. I added lightly salted cashews and almonds this time, because I love cashews. I also added some corn (after I took the photographs) for added sweetness.

I admit I wasn't eating healthy all the time. In fact, I've always liked salads but with mayonnaise or thousand island. And I've only started using healthier dressings like vinaigrettes recently. I think it's also because I like stronger flavours and I don't think I could ever evolved to eat salads only with olive oil.

Now, if you really need to know, I mixed some apple cider vinegar, olive oil, about half a teaspoon of honey, pepper and about 1 teaspoon of soy sauce together to get the dressing for this salad. I don't even remember the proportions. But you know, taste test!

Have I succeeded in keeping my blog alive and reminding you that it's time to stop the new year binge?

20 January 2008

Birthday Baking - Part 2

Okie! I'm back with the recipe! Did you miss me?


White Chocolate Orange Cake with Cranberry Jam

Ingredients
100g white chocolate
110g butter, softened
120g granulated sugar
2 large eggs
1 heaping tbsp grated orange zest
160g all-purpose flour
1/2 tsp baking powder
1/2 tsp baking soda
1/8 tsp salt
120ml milk

50g sliced almonds, lightly toasted
4 - 5 heaping tbsp cranberry jam, warmed
1 tbsp icing sugar
2 - 3 tsp warm water
icing sugar, to dust

- Preheat oven to 180°C.
- Melt chocolate in a double boiler or in a bowl set over a pot of simmering water, making sure that the bottom of the bowl is not touching the water.
- Beat sugar and butter in the bowl of an electric mixer until light and fluffy (~ 3mins). Meanwhile, sift flour, baking powder, baking soda and salt and set aside.
- Add the eggs, one at a time, allowing to mix 30secs between additions.
- Add melted chocolate and orange zest. Beat for 30secs.
- Fold in 1/3 of sifted flour mixture and then 1/2 of the milk.
- Repeat until all the flour has been well incorporated. Do not over mix.
- Bake in a greased and lined 7" baking tin for 35mins or until a testing pin inserted into the center of the cake comes out clean. If the cake is browning too rapidly, cover with aluminium foil.
- Turn cooked cake out to cool on a wire rack before proceeding to assemble.
- When cake is cooled, slice into 2 rounds with a large, serrated knife. I find it easier to cut by placing turning the cake and cutting slowly from the circumference to the center. If the cake has a dome, even the top by cutting the "extra cake".
- Spread cranberry jam generously over the bottom half of the cake and top with the other half of the cake.
- Mix 1 tbsp of icing sugar with the warm water, 1 tsp at a time, to get a paste. Spread this thinly over the top of the cake.
- Sprinkle sliced almonds to cover the top of the cake.
- Dust with icing sugar.


I think I did mention about messing up the cake quite a bit. In order to provide you with full information and also entertainment, here's what happened:

(In no particular order)
1. I was lazy and skipped lining the tin so the cake got a little stuck. And a part of it broke while I tried to, frantically, get it out of the pan. But I pieced it back, so you can't see it.
2. I used a mixture of white and brown sugar so the cake wasn't as white as I would like it. It's got nothing to do with taste, but if you wanted it to look better, I'd suggest using only white sugar.
3. I wanted to make a white chocolate ganache for the outside of the cake, but due to miscalculations, it just wouldn't thicken up. So I have a lot of chocolate "sauce" left.
4. My almonds were more than lightly toasted. They were quite, erm, well-browned. So I covered up with icing sugar so you wouldn't notice.
5. So in my recipe I've included an icing sugar paste to spread over the cake. It's to act as *glue* for the almonds to stay on the cake. As you guessed, I didn't think of it when I was in the middle of trying to fix the above 4 problems of my cake. And my almonds were falling all over the place when I cut the cake.
6. I think 5 glitches are enough for a poor birthday cake.

13 January 2008

Birthday Baking


Here's what I promised to be up by this week! My belated birthday cake! I kinda messed up quite a lot here and there, but that'll come later. Fortunately I was able to do emergency rescue procedures to salvage the cake and make it look presentable!

I don't have much time to post today, so I won't have a recipe yet. But let's hope it'll come soon, okie? =p

11 January 2008

Special


red riding hood in paris, originally uploaded by Ms_evinrude.

It's a special day today!