29 September 2007

When Time Isn't On Your Side...

You make sandwiches!

Alright, that's not exactly what you should be doing when you've got no time on your hands and lecturers are hounding you for your assignments. When that happens, you simply forgo sleep and lunch to fulfil your duties as a student. Sandwich-making should be the last thing on your mind.

BUT! If you know me enough, it just doesn't make sense to not whip up something to eat when you're at home with a refrigerator full of ingredients to use! So for the 2 days when I stayed at home, barely sleeping 3 hours a day, I ate sandwiches for lunch. Very good sandwiches.

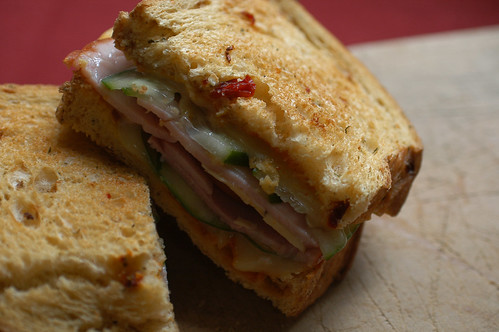
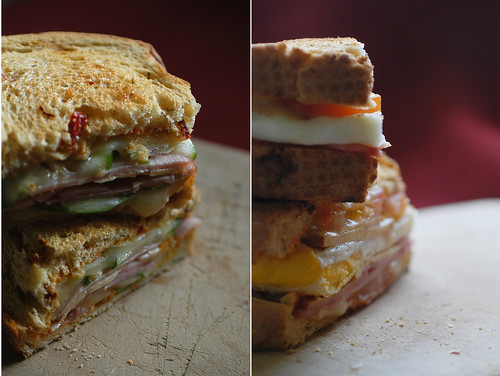
Day1: Ham, cucumber and double cheese.

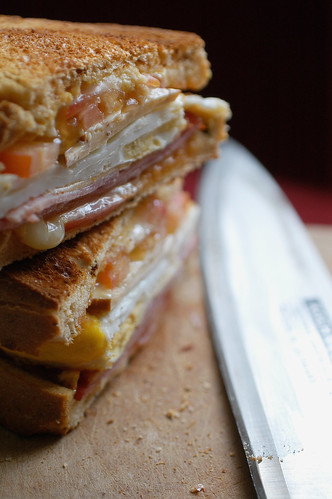
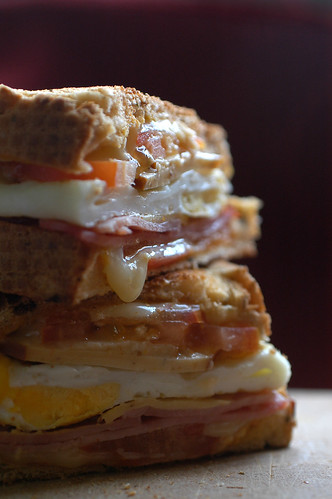
Day 2: Ham, tomato, egg and double cheese.

I don't think you would need a recipe for my sandwiches because, honestly, I didn't use one. Fact is, they don't *require* cooking, except the poached egg. But I do swear by toasting my sandwiches after assembly and before eating. One, when there's cheese, the heat would melt it and who doesn't like melted cheese?! (If you don't like melted cheese, I think there's something wrong somewhere) Two, I like my bread toasted warm and slightly crispy.

Another reason for not using a recipe is just simply because you might not like mine. I like to spread mustard and sweet chilli sauce on my bread before layering on the sandwich filling. You might not like that mustard and chilli combination. I always try to have some kind of "plant material" like tomatoes, lettuce, cucumbers and/or onions in my sandwich. You might not like tomatoes. Or lettuce. Or cucumbers. Or you just don't like vegetables altogether. Which makes you like my sister and previous Biology lecturer and not very healthy.


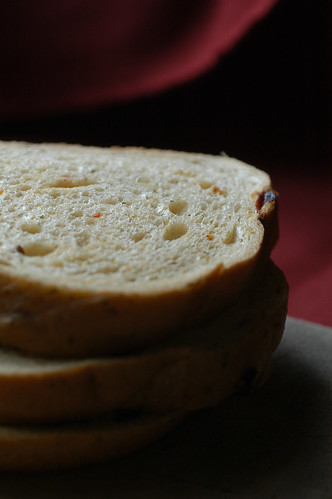
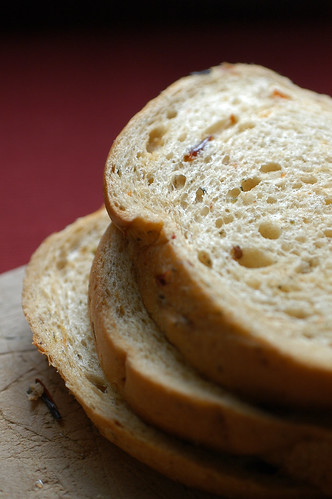
So, it makes things easy, just focus on getting the best ingredients. I'm not one for white bread. Like white, white bread. If I had any choice, I would get bread that has something, anything, that makes it not white. And I like crusty, chewy bread. My favourite bread to go to currently is the Savoury Delight Loaf from Gardenia. But, it seems like it isn't available now. Maybe because Bonjour has one that's exactly the same, just in a different shape and not as chewy. But the addition of sun-dried tomatoes and herbs makes it really good. Even if eaten on its own.


Well, maybe you should start your own sandwich-making session now. I think I might have ran out of things to say about my sandwiches.

26 September 2007

Sneak Peek!

10 September 2007

Crumbles and Crisps


Don't you love apple crumbles? Crisps, crumbles, whatever you call them. They're so easy and comforting. Somewhat like an apple pie, but not as boring.

The first time I had an apple crumble, I had it at Swensens. Probably not the best place to have my first meeting with the delightful dessert, but it was great all the same. Warm apple crumble, on a hot plate, with a scoop of vanilla ice cream. Ooh~ how I have sinned! But that was really long ago.


I managed to squeeze in this apple and cherry crumble before the cherry season ended, which, was also really long ago, but not quite as long as my first date with an apple crumble. I nearly wasn't going to make it until the house warming party that I went to the day before I baked served apple crumble. Now that got me started! I really do need a kick in the ass sometimes to get going. Like jogging, doing assignments, cooking, tidying up my space... well you get the idea.

Now when I said that apple crumble was really easy, I wasn't exaggerating. It really is quite a no-brainer and I don't think you could ever go wrong when making an apple crumble, or any crumble. I did come across some recipes for crumbles/crisps when food blog-surfing and picked up some tips. For the first time I made my crumble, I followed a combination of 2 recipes. For the crumble topping that is. And if it's your first time reading, yes, I do believe that you can substitute anything you want for the filling! That's how I like my recipes: flexible!


I really liked how the addition of cherries give the crumble a nice ruby red hue! Doesn't it perk your appetite, that lovely colour? I didn't have fresh shredded coconut at hand and used dessicated coconut instead. I'm not quite sure if it made a difference to the texture and flavour, but hey, I love coconut and any form is greatly welcomed! I really liked the generous amount of crumble topping in each spoonful because that's my favourite part of the crumble. Well, not surprising for one who used to eat pie crust after finishing the pie filling. But I did feel that my crumble filling was a bit on the dry side and a little too sweet for my taste. But that can easily be solved by adding more lemon juice or skipping the flour for the filling and less sugar.

Haalo recommended trying the crumble in 3 ways: hot from the oven, warm and cold, which I did! And I do have to say I much prefer it hot or warm. The cold crumble wasn't, um, crumbly anymore. It was more like, um, hard. I didn't serve it with cream like Haalo because, I don't like cream and the crumble itself was enough to spoil my diet. Hee~ But if you're a cream lover, and someone who never needs to go on a diet (blah!), go ahead and have all the cream that you want!


Apple and Cherry Crumble


Ingredients
Filling
2-3 Granny Smith apples
200g cherries, pitted and halved
Juice of 1/2 a lemon
3 tbsp soft brown sugar (I would reduce this the next time)
2 tbsp palm sugar
1/4 tsp grated cinnamon
1-2 tbsp plain flour (optional)

Topping
150g plain flour
1 1/2 tsp baking powder
40g dessicated coconut
50g rolled oats
70g soft brown sugar
Zest of 1/2 a lemon
Pinch of salt
120g butter, melted

- Preheat oven to 180 deg C.
- Core and dice apples into bite-sized pieces. I suspect I cubed my apples to tiny and it didn't give the "bite" that I was looking for like in apple pies. I don't peel my apples and that didn't give my crumble any problems.
- Toss apples with all other ingredients for the filling in a large bowl and set aside in the refrigerator.
- For the topping, toss all dry ingredients in a large bowl and ensure they're evenly mixed.
- Add melted butter and incorporate into the dry ingredients with fingertips. It should turn out slightly lumpy, but not too wet. Feel free to add more flour or butter if you find that the topping is too wet or dry respectively.
- Spoon the filling into one large baking dish or individual ramekins (I used 3 small ones). Layer the topping on top of the filling. The topping layer should be quite thick. Just make more topping if you find it neccessary!
- Bake in preheated oven for 40mins if using one large ramekin or 20mins if using individual ones. The topping should be golden brown and juices bubbling underneath.
- Serve warm!

08 September 2007

Woohoo!

I can finally breathe! After 2 weeks of sleepless nights and working at wee hours of the day, I get my long deserved break. Not a total breakaway from school but at least I can relax a little.


I took the photos of these moomin biscuits quite some time ago, but have yet to have the time to post time here. I admit I was attracted by their cute appearance and packaging (Mama taught me that first impressions count), but don't you think they're cute?! I bought them at Daiso, the $2-chain. Besides being cute, they do taste good, a little like regular baby biscuits. What I really like about them is that the box contained 2 small air-tight packs of biscuits, which really solves the problem of having to find an air-tight container if I couldn't finish all the biscuits at one go. But I did also realise that they don't soften as quickly as most other biscuits when left out of their packagings.

Besides eating and photographing, I did play a little with those little moomin characters... Shh~ don't tell my mum!