31 July 2008

Salad in a Cup


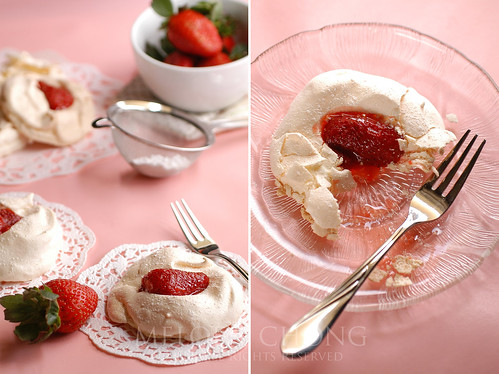
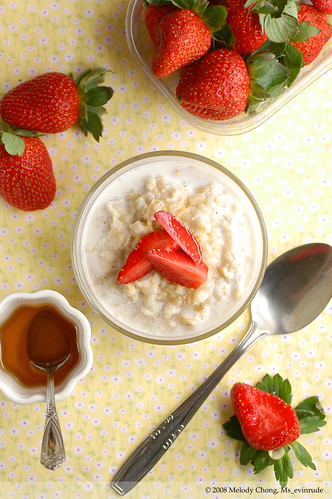
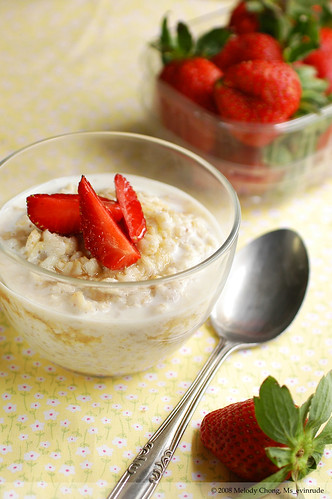
Seeing that more than a few days have passed since I posted my previous recipe and my pictures for this post on Flickr, I thought I had better get on with it. You know, in case I get all lazy and decide to procrastinate (again) and end up not posting it at all. I've decided to take a little break from strawberries but I do still have some strawberry recipes scheduled to be posted but that'll come later. School's been busy, even though it's only 2nd week of the term and semester. I've been wanting to pack lunch, but almost always too tired at night to prepare for the next day or that I have too many things to bring to class and don't want to add to the "luggage". Forgive me, I do rant a lot.

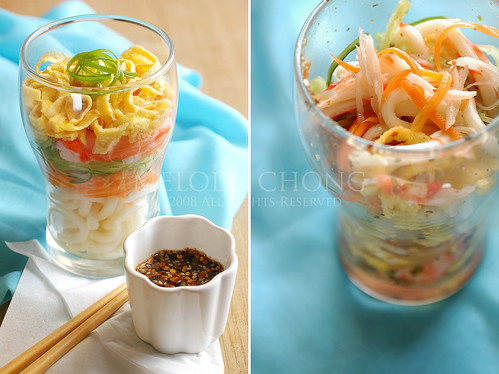
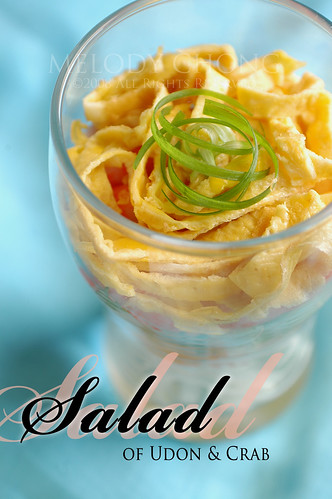
Now, about the recipe! I think I have already established the fact that I'm a salad girl. And I don't have to remind you how easy it is to throw together a salad! Since starting my low-carb diet years ago, I've been actively trying to cut down on my carb intake. So rice had to go, most potatoes too. But I really love noodles. Soba, glass noodles, udon, vermicelli, ban mian, etc. So sometimes for variation, I add noodles into my salad. This salad of udon and crab was very much inspired by Pepper Lunch! Udon makes a good addition to a salad because it's just a plain noodle, hence makes a good base and mingles with flavours well. Serving the salad in a cup/glass was very much triggered by the fact that Pepper Lunch served theirs in a plastic cup. Isn't it genius?! All you have to do is put the ingredients in the cup, drizzle the dressing and then give the cup a good shake (covered of course!) and there you go! No messy tossing with forks or spoons. And it's some exercise before you meal! All good things.


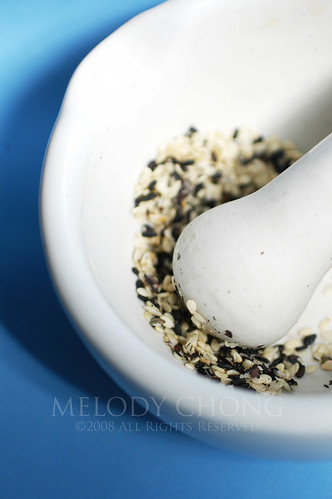
Black and White Sesame Seeds

For this recipe, I used Surimi crab, which basically is imitation crab meat. But instead of the crabsticks, I used those found at the sushi counters in Cold Storage. I find (ok, think) that it tastes more like crab meat. If you're feeling luxurious and hardworking, buy crabs, cook them and remove flesh from the shells! The dressing is again, something that I just threw together with the ingredients I had on hand and feel free to adjust the proportions to your likings.


Salad of Udon and Crab
(Serves 2)

Dressing
4 tbsp soba shoyu (or Japanese soy sauce)
1 tsp sesame seeds, toasted and crushed
1 tsp chili flakes
1 tsp honey
1/2 tsp sesame oil

100g fresh udon
1 egg, beaten
1 cucumber
1 medium-sized carrot
100g Surimi crab (or fresh crab meat)

- Combine all the ingredients for the dressing together in a bowl and mix well. Leave to sit while preparing the other ingredients.
- In a pot of boiling water, cook the udon for about 1 - 2mins. Drain and let cool.
- Heat 2 tsp of oil in a frying pan and fry the egg to make an omelette. Remove from frying pan and let cool before cutting into 1cm strips. I find it easier to cut the omelette into half, then roll each half to cut.
- Wash, peel (if desired) and cut off the tops and ends of the cucumber and carrot. Grate the vegetables to get thin strips. I like to use the largest grater for salads like this. Alternatively, you can julienne the vegetables with a knife. If you find the carrots too raw for your taste, you can blanch them in hot water for about 30secs.
- To assemble, layer the ingredients for the salad into 2 glasses for individual servings. First being the udon, then carrots, then cucumbers, crab meat and then the omelette. Garnish with spring onions or coriander if you wish to. Let chill for about 10mins in the refrigerator.
- When ready to eat, drizzle the dressing over the salad, cover the glass with a plate or saucer and shake! If presentation and playing with food isn't your thing, just toss everything in a bowl and enjoy, but it won't be so fun of course.


22 July 2008

Sweetly Pink


Haven't I been a good blogger these couple of weeks? Tee hee... I've got posts up within 1 week of each other for 2 weeks now! Alright, I'm starting to wonder if you guys are getting sick of strawberries. But I still have a few more posts on strawberries that I have yet to publish. I don't know, but I really think I went a little crazy for strawberries. But, I digress.

So, the Indonesian strawberries weren't very tasty. Though that is quite a sad truth about strawberries that weren't exactly cheap, I think it gave me the opportunity to try salvaging it. I had been wanting to try a recipe from Anita at Dessert First but always used the strawberries up for something else more suitable for it. So with the quite tasteless strawberries, I set on to roasting them and use as a topping to some citrus-flavoured meringues. Pairing light, crisp meringues with roasted, syrupy strawberries seemed quite genius to me. It's a very easy recipe, but I think the result looks so classy!


I wanted to make a refreshing dessert with this but encountered slight problems. Firstly, although I really love the texture of meringues (you know how the crispy outer shell breaks and dissolves away to reveal the very soft and light innards), I really find them a little too sweet. But to yield a nicely whipped and dense meringue, you'll need at about 50g of sugar per egg white (most say 60g but I've tried 40-50g with good results too). And then there was the problem of flavouring the meringues. I wanted to flavour it with citrus juice and zest to counter the sweetness but it didn't quite show through. Or perhaps I just wasn't brave enough to add enough juice to the egg white. Still, I think it's a recipe worth a try if you're aiming for something more fancy yet still easy to make.


Getting ready to make meringues


Citrus Meringues with Roasted Strawberries
(Makes 6)

3 large strawberries or 6 small ones
2 tbsp sugar
1/2 tbsp lemon and orange zest

1 large egg white
50g sugar
1/2 tbsp lemon juice
1 tbsp orange juice
1 tbsp lemon and orange zest

- Preheat oven to 200 degC.
- Wash and hull strawberries. If they are big, cut them in half.
- Place the strawberries on a baking sheet and sprinkle with the sugar and citrus zest. Roast in the oven for about 10 minutes or until soft and syrupy.
- Lower the oven temperature to 120 degC.
- To make meringues, beat the egg white with an electric mixer until soft peaks.
- Add sugar gradually while beating until stiff peaks form. When the egg whites are about ready, add the citrus juice and zest.
- Spoon tablespoonfuls of the meringue onto a lined baking sheet to make 6 meringues. Make a little dent in the center of each meringue to hold the strawberries.
- Bake the meringues in preheated oven for about 30mins or until crisp on the outside. Let the meringues dry in the oven for another 30mins.
- To serve, top each meringue with roasted strawberries. The meringues alone keep well in an air tight container for up to 1 week.

16 July 2008

Comfort Food


Don't you hate falling sick? I do. But I'm also glad to say that I'm not all that susceptible to colds and flu and fall sick only, thank god, a couple of times a year. But, rather unfortunately too, I fall sick during a break after a long period of stress and hard work. It's like the immune system relaxes just as I start relaxing too.

Last week, having completed my internship, I finally got a chance to wake up late on a weekday and had planned to start a cooking and baking spree and do some blogging. But I just had to come down with an infection. A gum infection. I don't know how it happened, but I woke up on Sunday and it started feeling sore. By the time I checked to see what really was the problem in the evening, there was this large ulceration at the back of my jaw and the pain had spread to my throat. For anyone who had the rather unfortunate experience of a bad wisdom-toothache, you'll know how it's like to not be able to open your mouth big enough to put food in with a spoon.

So by the time Monday came, I was yearning to cook and photograph but not really wanting to eat. Now there's this one thing that I always cook for myself when I fall sick: barley. Yup, pearl barley. I just cook some in lots of water till tender, add some sugar and have that for the whole day. It's almost like a craving for times when I'm unwell. Still, I wanted to tie it in with the strawberry phase that I'm currently in and plain cooked barley didn't seem to accommodate the red berry quite well. A little thinking and a barley and oatmeal porridge was cooking on the stove. The barley added a nice bite to the porridge which I liked (a little ironic since I was down with a gum infection) and topped with strawberries and honey, makes a wholesome breakfast for a gloomy Monday morning. Besides the chewiness of barley, I also like my oatmeal porridge, any porridge for that matter, a little thicker. A little like a pudding I think.

The strawberries I used this time were from Indonesia and I was really quite happy to find them at a Shop & Save outlet. They were really beautiful, I have to say. No bruises at all, lovely leaves and even some remaining petals on the berries! Gorgeously red and in small punnets, which I think is good if you can't finish the very perishable fruits fast enough. At S$2.95 for 1/2 a pound-punnet, it's almost the same price as the US strawberries when they're not on sale. So I put them into my shopping basket to bring home to try. They lasted long for strawberries, I bought them on Thursday night and they remained perfect for 1 whole week. However, I'm sad to report that they were really quite tasteless, if not really tart. Oh well...

Barley and Oatmeal Porridge
(Serves 2 small stomachs)

50g pearl barley
50g rolled oats
2 tbsp cereal mix (not breakfast cereal! i used this but it's optional)
300ml milk

Strawberries, hulled and quartered
Honey

- Rinse the barley and cook in a 2 cups of water for 30mins or until tender and the water is almost evaporated. If the water has evaporated before the barley is cooked, add another 1/2 - 1 cup of water.
- When the barley is tender, add in rolled oats, cereal and the milk. Stir and continue cooking until the oats are cooked through, adding more milk if desired.
- Serve warm, topped with strawberries and drizzled with honey.


11 July 2008

Keep Jammin'

No excuses this time. The latest hiatus is just due to my laziness to blog after a day's of work at my internship company. So, after a full month of non-blogging action, I'm continuing with my strawberry phase with homemade strawberry jam!


Previously, I've done a brief introduction on Korean strawberries. This time I used their American counterparts. I would have bought the Korean strawberries if they were still available when I was at Carrefour, but the US strawberries were the only ones left. As previously stated, I found the US strawberries much bigger (mostly) than the Korean ones but usually were more bruised, probably from the rough packing and travelling. They were about to die quite a horrible death on the shelves and I had quite a hard time choosing the best 2 punnets for my jam making. But it wasn't all bad since they were even cheaper than stated and I paid only S$8.90 for 2 pounds of awfully ripe strawberries. Being very ripe (you know, almost turning black), they were very very fragrant and really sweet. My family ate almost 1 pound while I hulled and cut the strawberries to make jam. In the end I only had a little over 500g of strawberries left to make jam but it was all good since I didn't have too many jam jars on hand either.

Jam making, apparently, seems to be quite a daunting task for many, but it's really quite easy! All you do is boil the cut fruit and sugar in a pot to the desired consistency and you'll have nice bottles of jam for toast every morning. The tiring part probably is to keep an eye on the jam and stir it almost constantly so that it doesn't burn. I like my jams thicker for easy spreading on toast and whatnots so I've stated a longer cooking time. Some recipes include the addition of pectin for better jelling but I didn't think it was necessary after perusing recipes that I've found online. There's also a cold saucer test that might be quite useful though I didn't rely on that. The recipe I followed mainly was Mae's recipe but hers was more syrupy and I also think the ripeness of the strawberries affect the jelling effect. So just adjust cooking time to your liking.


Strawberry Jam
(Makes 2 - 3 275ml jars)

500g strawberries
300g sugar
1 tbsp lemon zest
1 tbsp lemon juice

- Wash, hull and quarter the strawberries. You can als
o half them (for a more chunky jam like Mae's) or blitz a portion in the food processor. Set aside.
- In a heavy bottom saucepan, combine sugar, lemon juice and zest and stir over medium heat until the sugar has dissolved.
- Add the strawberries and stir gently until it comes to a boil.
- Cook, stirring constantly, for 40 - 60mins depending on the consistency you like. I cooked mine for 60mins. For a thicker jam, you can do a test with a cold saucer (popped into the freezer before you start cooking), drop a bit of jam onto the saucer and leave for a few seconds. If the jam still runs like a liquid, cook for another 10mins and test again. It's advisable to start testing at about 40mins and gradually increase the cooking time. You can also taste the jam and add more sugar if desired.
- Fill the jam into sterilised jam jars leaving about 1cm from the brim(careful it's hot!) and screw on the cap tightly. Let cool. For more presentable jam to be used as gifts, spoon off the foam on the jam before filling into the jars. I didn't bother because I thought it was quite a waste of beautiful jam.